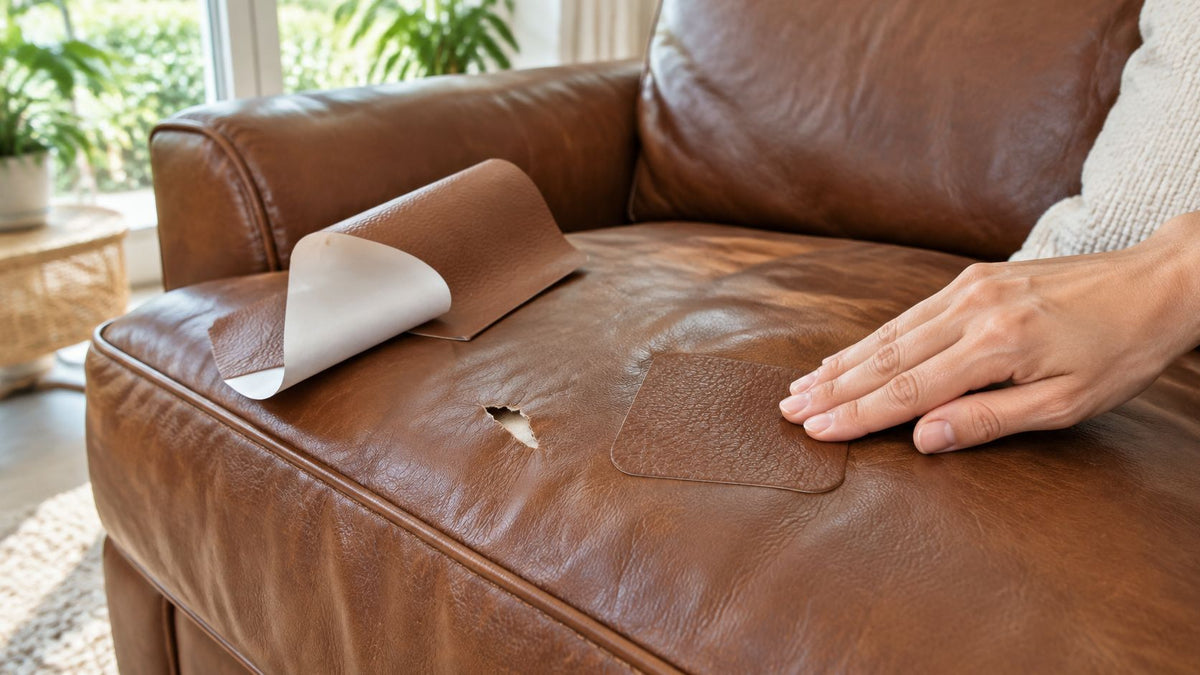
A scuffed chair arm can be a sensible candidate for a self-adhesive leather repair patch: a single peel-and-stick 50 × 120 cm sheet that conceals a tear, scuff, scratch or worn area under a new surface. The patch doesn't rebuild missing leather, fill holes or re-colour the surrounding area, so choose by the condition of the damage first, then by colour.
That distinction matters when you're looking for a leather repair patch in Australia. A neat-looking sheet won't solve failed stitching or stick reliably to a surface that's coming apart, and a convincing colour match won't prevent heat from affecting the adhesive.
Table of Contents
- What Is a Self-Adhesive Leather Repair Patch?
- Which Types of Leather Damage Does a Patch Suit?
- How Much Damage Can One 50 × 120 cm Sheet Cover?
- How Do You Pick the Right Colour?
- Does Heat or Moisture Affect How a Patch Holds?
- Should You Buy a Patch or a Repair Kit?
- Where Can You Buy a Leather Repair Patch?
What Is a Self-Adhesive Leather Repair Patch?
A self-adhesive leather repair patch is an adhesive-backed sheet cut to shape with scissors and placed over localised surface damage, rather than a material that reconstructs the damaged leather.
The Self-Adhesive Leather Repair Patch is supplied as a single 50 × 120 cm sheet. Its listing says no sewing or special tools are needed and describes it as universal for sofas, chairs, car seats and bags. “Universal” describes the intended range of uses, not certainty that the adhesive will suit every finish or damaged surface.
The useful way to think about the product is as a replacement visible surface over a limited area. The original damage remains underneath, and the surrounding upholstery still needs to provide a sound place for the adhesive to grip.
Concealment rather than reconstruction
A patch changes what you see and touch over the damaged spot. It doesn't bring separated stitching back together or restore material that has disappeared.
- What changes: The tear, scratch, scuff or worn area is covered by a new surface.
- What remains: The original upholstery, its existing weaknesses and any underlying damage stay in place.
- What you'll notice: The patch sits on top, so its outline and difference in finish can remain visible up close.
Practical rule: Buy a patch when you're comfortable with a visible repair, not when you need the original finish recreated.
Small household repairs have a place in Australian furniture reuse. A City of Melbourne furniture study run through RMIT PlaceLab found that furniture repair attracts significant interest among surveyed residents.
Those findings don't establish how any particular patch performs. They do put a modest surface repair in perspective: retaining a useful item doesn't always require restoring it to showroom condition. The important question is whether the item needs cosmetic improvement or a repair that carries load.
Which Types of Leather Damage Does a Patch Suit?
A self-adhesive leather repair patch suits localised cosmetic damage where the surrounding surface remains sound, but it isn't a stand-alone solution for failed seams, substantial holes or upholstery that's peeling apart.
Judge the job by the damage type and by where the furniture sits, not by colour alone. A patch on an armrest that cops afternoon sun through a window faces adhesive stress a shaded ottoman never sees, so heat and light exposure belong in the go-or-no-go call before any shade matching starts. A shallow claw scratch on otherwise intact upholstery is also a different job from a split that opens whenever someone sits down.
The categories below give an initial check.
| Damage | Patch suitability | Main limitation |
|---|---|---|
| Localised scuff or scratch | A reasonable cosmetic option | The surrounding finish must remain sound |
| Small tear with stable edges | May suit a surface patch | Movement can keep pulling the tear apart |
| Puncture or larger opening | Assess reinforcement needs first | A surface sheet doesn't replace missing support |
| Split stitching or tensioned seam | Not a stand-alone patch job | The failed join still needs repair |
| Severely cracked or delaminating surface | Poor candidate | The adhesive would be attached to unstable material |
Look for movement and missing support
Claw scratches on an arm, splits along seat seams and worn cushion edges can look similarly untidy, but they don't have the same repair requirements. Avoid placing a patch directly over a highly tensioned seam or cushion edge, and don't expect it to replace failed foam, stitching or framing.
Backing behind a larger tear lets loads transfer into intact material rather than remaining concentrated at the tear. A visible adhesive sheet and an internal reinforcing patch serve different purposes.
Peeling bonded leather across a whole seat is a job for a full couch cover, not a patch.
Separate damage from discolouration
A stain alone isn't necessarily a reason to cover the surface.
Likewise, styling ideas for brown leather sofas address appearance rather than structural repair. Don't confuse improving the room's presentation with making damaged upholstery sound.
How Much Damage Can One 50 × 120 cm Sheet Cover?
A 50 × 120 cm self-adhesive sheet gives you enough material for a small scuff or a long split, as long as the cut piece can extend onto sound leather around the damage and leave clean, rounded corners.
Measure the repair outline before you measure the tear. The patch needs a bonding margin, so a hairline scratch can still fail if the edge lands on cracked finish, while a longer mark over stable material can be covered neatly if the shape is planned.
Cut for stability first
A narrow scratch usually needs a modest piece. A worn strip along a front edge needs a longer rounded shape, but sheet size does not make stretched leather, a failed seam or active peeling suitable for a cosmetic cover.
- Allow a margin: extend past the damaged perimeter onto intact surface.
- Round the corners: sharp corners are easy lift points.
- Keep useful offcuts: store remaining pieces for a later compatible repair after checking finish and adhesion.
Treat coverage as a fit question: will the patch sit flat, reach firm material and avoid constant flex or direct heat and sunlight where it will be used? If any of those fail, more sheet area will not rescue it.
David R., on the Self-Adhesive Leather Repair Patch: "it's good quality and big enough to cover a decent area"
That comment supports the sheet's usable size as one buyer experienced it. It does not set a maximum repair length or prove bond strength on every finish.
The right test is the damaged surface, then the position it will sit in. Pick the colour after those pass.
How Do You Pick the Right Colour?
Start with what a patch cannot do. No colour choice will disguise a raised edge, a different grain or a contrasting sheen, and even a close match stays visible on inspection. Judge the repair by the damage it covers and the light it sits in first. Colour comes second.
When you do compare shades, hold the decision against the actual surface in daylight, where the item normally sits. And when two shades look close, take the slightly darker one. On a worn area it reads less obviously than a lighter one.
The available choices are Beige (Off-White), White, Khaki (White Choco), Grey, Black, Orange, Chocolate and Dark Brown. These are product colour names, not assurances of an exact match to another manufacturer's upholstery.
Compare the surface, not just the colour name
Match against the worn area and its immediate surroundings. An unworn, shaded part of the same item can mislead you if the repair will sit against a visibly different surface.
- Check beside the damage: The neighbouring surface is what the patch must visually blend with.
- Consider the finish: A similar colour still looks wrong if the texture or sheen contrasts.
- Decide in real light: Don't make the whole call from a screen or from lighting elsewhere in the house.
- Keep expectations realistic: A colour name narrows the choice. It can't confirm a match by itself.
A close colour match can make a patch less conspicuous. It can't make a raised edge or a different surface texture disappear.
Allow for a match to change in sunlight
UV exposure can fade the patch and the surrounding leather at different rates. A match that looks convincing on day one can drift apart on an item kept under a window.
That makes location part of the colour decision. A sun-exposed seat carries a different appearance risk from one kept away from direct light, even when both start with the same shade.
Don't pick a lighter or darker shade to pre-compensate for fading you can't predict. Choose the closest acceptable appearance under the item's normal lighting, and accept that ongoing sun exposure adds uncertainty either way.
If none of the listed colours looks acceptable against your upholstery, the sensible call may be not to patch. A clearly visible repair can still be useful, but buying on the assumption the colour will somehow settle into a match is a poor basis for the decision.
Does Heat or Moisture Affect How a Patch Holds?
Yes. Heat softens pressure-sensitive adhesive, and water, cleaner film or conditioner residue can stop it from wetting the surface properly. On seating, the bond also deals with flex, shear and peel every time someone sits down or gets up, so a firm feel on day one is only the start of the test.
The risk is set by where the repair will live. A patch on a shaded chair, a lounge under afternoon glass and a car seat in summer are three different jobs even if the colour is identical. Warm adhesive can creep, rounded corners help but do not remove the hazard, and once an edge lifts it tends to catch clothing and keep working loose.
Judge the surface before the shade:
- Sun through glass can heat a small repair zone well above room temperature.
- Vehicle interiors can punish adhesive that would be acceptable indoors.
- Damp leather, recent cleaner or trapped moisture reduces contact area.
- Leather conditioner leaves a film between adhesive and substrate; do not condition right before fitting.
Bostik Australia's leather-adhesive guidance calls for clean, dry surfaces free of dust, dirt and grease. Use that as the prep principle, then follow the sheet's own instructions rather than treating liquid-glue directions as interchangeable.
Clean enough to bond without stripping the finish
The aim is contamination removal without new damage. Future Classics Furniture's leather-care guidance cautions against excess moisture, harsh cleaners, solvents, abrasives and vigorous rubbing. A hidden spot check for colour transfer and finish reaction is safer than sanding or solvent by default.
A patch cannot rebuild missing leather, stop a tear from spreading under load, or guarantee permanence in a hot, damp or flexing location. Decide those limits first; colour comes after. For broader upholstery context, Casamé Home's faux leather couch guide explains coated and imitation finishes, but it is background rather than proof of adhesion on a specific item.
Should You Buy a Patch or a Repair Kit?
A scratch across a sofa arm and a flattened, worn-through seat panel can look similar in a photo, yet they call for different products. Buy a self-adhesive patch for surface concealment, or consider a repair kit containing filler or colourant when the job requires building up or re-colouring a damaged area and the kit is suitable for that surface.
The Self-Adhesive Leather Repair Patch is not a kit. There's no filler, colourant, sandpaper or adhesive bottle included, and buying the sheet doesn't provide the materials for a multi-stage restoration.
A kit also isn't automatically the right answer. Its contents, compatible finishes and required technique matter, particularly when the desired result depends on blending colour rather than covering a mark.
Patch and repair kit at a glance
| Factor | Self-adhesive patch | Repair kit with filler or colourant |
|---|---|---|
| What's included | An adhesive-backed sheet | Contents vary; check for the stated filler, colourant or adhesive |
| Main purpose | Conceals damage beneath a new surface | Builds up or re-colours a damaged area, depending on contents |
| Missing material | Doesn't reconstruct it | Filler may address suitable localised losses, not structural failures |
| Colour result | Depends on choosing a supplied shade | Depends on the colour system and the user's matching work |
| User requirements | Measuring, cutting and compatibility assessment | Product-specific preparation, filling or colouring skills |
| Structural damage | Not a substitute for reconstruction | Not automatically suitable either |
Choose the finish you're willing to accept
A patch trades restoration work for an added surface. A filler-and-colourant approach trades that visible overlay for more involved work and a result that depends on compatible materials and technique.
Decision check: If the repair needs new stitching, internal support or replacement upholstery, neither a cosmetic patch nor colourant alone addresses the whole job.
Repairing or refurbishing a piece to extend its life before disposal is the sensible order of operations. The useful objective is to retain a serviceable item, not to insist on a surface fix when structural work is needed.
Since only the patch is stocked here, a filler-and-colourant job means buying elsewhere. If your decision takes you towards a separate textile solution instead, you can find slipcovers for your sofa, but check the individual product's dimensions and configuration requirements rather than assuming a fit.
Where Can You Buy a Leather Repair Patch?
You can buy the Self-Adhesive Leather Repair Patch from Casamé Home, with AUD pricing, the single sheet size described above and the listed colour choices.
The purchase decision should follow the inspection, not replace it. A product described for sofas, chairs, car seats and bags still needs a sound, compatible surface and a repair shape that avoids relying on damaged material for support.
Use a short buying checklist before selecting the colour. That's more useful than choosing solely by the closest-looking product photograph.
Check the job before checking out
- Confirm the damage type: Distinguish a localised cosmetic defect from failed stitching, unstable coating or missing support.
- Measure the intended outline: Include a margin onto intact material, not just the visible mark.
- Judge colour in place: Use daylight and the item's normal setting rather than relying only on a screen.
- Check surface readiness: Allow for cleaning and complete drying, with no conditioner beforehand.
- Accept the appearance: Decide whether a visible patch is preferable to the existing damage.
Keep the product description and your order details. The ACCC's repair, replacement and refund guidance explains consumer remedies for faulty goods, including products significantly different from their description or unable to perform their normal purpose.
Those rights concern the product supplied. They don't mean that an adhesive sheet must repair every finish, every tear or upholstery that's already structurally unsound.
Choose first, then plan the work
The step-by-step application guide covers how to use the patch after you've confirmed suitability.
The couch placement guide covers couch-specific positioning and the next decisions for upholstered seating.
A sensible purchase is one where the limitation is already understood: you're choosing a local cosmetic repair, not buying back the original leather surface. If the surrounding material is stable, the colour is acceptable and the setting isn't working against the adhesive, the patch is a practical option to consider.
If those conditions aren't met, pause rather than buying a larger sheet or expecting extra pressure to solve the problem. The right repair starts with recognising what has failed.
Casamé Home offers a self-adhesive leather repair sheet for localised surface damage, alongside home textiles. Visit Casamé Home to check the patch's listed colours and product details against your measured repair area before deciding whether it suits the job.