Mixing filler and sanding leather isn't always the right starting point. To use a self-adhesive leather repair patch, clean and completely dry the surface, flatten loose damage, cut a rounded patch larger than the affected area, then apply it with firm, even pressure. A leather repair kit and a peel-and-stick patch are different products, so check what you've bought before reaching for colourant, conditioner or sandpaper.
Table of Contents
- Is a Leather Repair Kit the Same as a Self-Adhesive Patch?
- What to Gather and How to Prepare the Damage
- How Big Should the Patch Be and How Do You Place It?
- Does a Patch Need Heat or Time to Stick?
- What to Do When a Leather Patch Lifts or Bubbles?
- Is a Patch Enough for Your Leather Damage?
Is a Leather Repair Kit the Same as a Self-Adhesive Patch?
No. Casamé Home's leather repair product is a self-adhesive leather repair patch, not a kit. That changes the job: you are covering a damaged area with a new surface, not rebuilding colour or missing leather.
Searching for how to use a leather repair kit can pull up steps for systems that work differently. A kit may fill, level and recolour; a patch can only mask what is underneath, so torn edges, loose fibres and oily residue still matter.
Full repair kit compared with the self-adhesive patch
| Item | Full repair kit | Self-adhesive patch |
|---|---|---|
| Main parts | Filler, colourant, sandpaper and adhesive | One peel-and-stick sheet, 50 × 120 cm |
| Colour | Mixed to match the surrounding leather | Choose from the listed colour options and check the match in daylight |
| Build-up | Filler applied in layers | Nothing built up; one sheet is placed over the damage |
| Sanding | Often needed to level the filler | Not needed |
| Curing or drying | Follow the kit's own instructions | Not required; the patch does not cure or dry |
| What it does | Fills and re-colours the damage | Hides the damage under a new surface |
The Self-Adhesive Leather Repair Patch is supplied as a 50 × 120 cm sheet that you cut down for the repair. Check the listed colour options on the product page against the leather in daylight before choosing one.
If you're unsure whether the upholstery is leather or a synthetic alternative, start with Casamé Home's faux leather couch guide rather than assuming every leather-labelled surface needs the same treatment.
Choose by the damage, not by the label on the search result. If the repair needs filler or colour mixing, follow that kit's own instructions. If the surface is sound and the goal is to hide a scar, a patch is the simpler tool.
What to Gather and How to Prepare the Damage
Surface preparation determines whether the adhesive contacts sound leather or removable residue, and it is where most lifting failures begin. The patch itself is forgiving; a greasy, damp or curled surface is not. No sewing or special tools are needed. Supply these ordinary items yourself:
- Sharp scissors for trimming loose threads and cutting the patch.
- A clean cloth that won't leave lint behind.
- A mild cleaner compatible with the leather's finish.
- Something smooth and firm, such as the back of a spoon, for pressing.
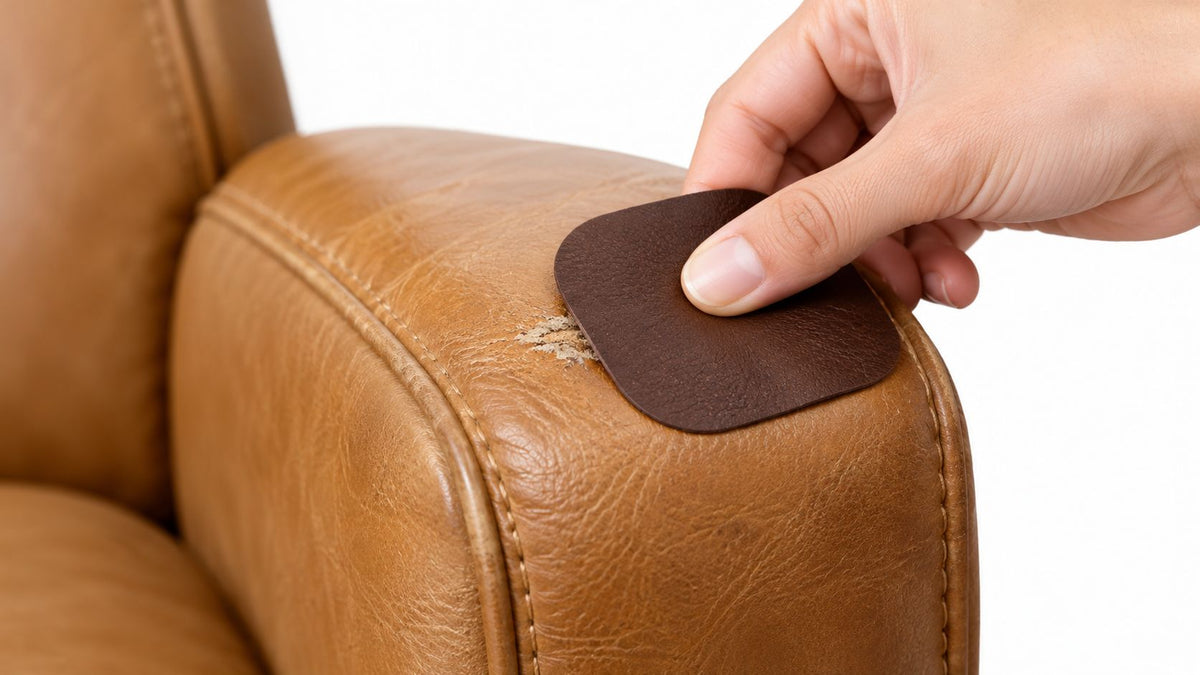
Clément B., who used the Self-Adhesive Leather Repair Patch on a worn leather chair armrest, wrote: "Super easy to apply, just peel and stick – no fuss at all." The preparation below is what keeps it that simple.
Clean, dry and flatten the surface
- Clean the area. Wipe with a barely damp cloth and a mild, leather-compatible cleaner, removing any cleaner residue afterwards. Skin oil, old conditioner and cleaning residue act as a release layer: the patch can appear secure initially, then lift at the edges later, so don't condition beforehand.
- Let the leather dry completely. Moisture between the adhesive and leather weakens the bond, even when the visible surface looks nearly dry. Wait until the area is fully dry without using heat to speed things up.
- Prepare the damage. Trim loose threads without cutting into sound leather, then press curled tear edges flat. The patch needs an even surface because raised edges hold parts of the adhesive away from the leather.
The pressing tool earns its place in that list. Adhesive grip depends on firm, even pressure across the whole sheet, so pick something smooth that spreads force instead of concentrating it under one fingertip.
"Mild" doesn't mean any household cleaning product is suitable. The Western Australian Museum's leather conservation guidance warns that cleaning can damage leather and advises caution with detergents, stain removers and similar chemicals. Test your chosen cleaner somewhere inconspicuous, and stop if the finish changes colour, becomes tacky or transfers onto the cloth.
For a superficial mark that may not need covering, Gates Home Furnishings' guide to how to touch up leather scratches provides context on scratch treatments. Don't combine a conditioning treatment with patch preparation, because a freshly treated surface isn't a clean bonding surface.
The application video offers a visual reference for handling the sheet.
Before you peel: Run a clean fingertip gently across the prepared area. The leather should feel clean, dry and flat, without an oily film or a curled edge catching your finger.
How Big Should the Patch Be and How Do You Place It?
Size the patch for the leather around the damage, not the damage itself. Cut with a margin on every side, round every corner, then align one edge and lower the sheet gradually while smoothing from the centre outwards.
The important measurement isn't just the length of the tear. You need enough sound, flat leather around the whole defect for the adhesive to grip. A patch cut exactly to the damaged outline leaves its edges sitting where the surface is least reliable, and the perimeter is where lifting almost always starts.
Measure and cut without wasting the sheet
Step 4 is to measure the complete damaged area, including fine splits that run beyond the obvious mark. Before cutting, hold the intended shape over the damage with the backing still attached and confirm every edge lands on intact leather.
A 50 × 120 cm repair sheet gives you room to work, but only if you cut sensibly. Take the piece from one end so the rest stays usable for later repairs. For a scuff or short tear, an oval or rounded rectangle serves better than a hard-edged square.
Round every corner deliberately. A sharp point gives clothing or a cleaning cloth something to catch, and once a corner lifts, everyday friction can peel it back further.
Size won't rescue bad leather. If the surrounding coating flakes away under a gentle touch, there is no stable perimeter for the adhesive to grip, and a bigger patch only gives you a bigger failure.
Lower the patch gradually
Step 5 is to expose only part of the adhesive backing. Align the first edge on sound leather beyond the damage, keeping the planned overlap consistent all around.
Hold the unplaced portion slightly above the surface and withdraw the backing steadily. As each section comes down, smooth it from its centre towards its sides so air escapes instead of trapping underneath.
Keep fingers off the adhesive, and don't let the exposed sheet fold onto itself. Peeling the whole backing away at once makes both mistakes far more likely.
On a couch, pick a flat area that doesn't cross a seam or a point that stretches when someone sits down. Never pull the leather tight to make the patch fit. The surface returns to its resting shape the moment you let go, and a patch laid over tension will pucker or release.
Rounded corners reduce catching, and centre-out placement gives air an escape route. Get both right before the final firm pressing pass.
Does a Patch Need Heat or Time to Stick?
A self-adhesive leather patch doesn't need heat and doesn't cure or dry; apply the patch at ordinary room temperature with firm pressure, then protect the bond from weight and friction while it settles.
Pressure-sensitive adhesive needs contact, not a drying shortcut. Pressing helps the adhesive flow into the leather's grain, but only where you apply pressure. A quick pat across the middle can leave the perimeter barely attached.
Make the pressure even
-
Press from the centre outwards. Use a flat hand to seat the patch, then rub firmly towards the edges with the smooth back of a spoon. Support the upholstery where possible so you're pressing the sheet against the leather rather than simply pushing the whole cushion away.
Make a second pass around every edge. Pay particular attention to rounded corners and any change in surface contour, keeping the spoon smooth against the patch rather than digging its rim into it.
- Control temperature and protect the settling bond. Apply at ordinary room temperature, not while the leather is cold on a chilly morning. Never blast the patch with a hot hair dryer, because excessive heat can soften the adhesive enough for the sheet to shift.
There's no drying time to count down, but that doesn't mean the area should go straight back into heavy use. Keep weight and friction away for a while, especially anything that could drag across the perimeter.
Check the edges before using the area
Move bags, loose cushions and other rubbing items away from the repaired spot. Keep pets from scratching across it, and don't wipe repeatedly over the fresh edges with a cleaning cloth.
Avoid testing adhesion by picking at a corner. That applies a peeling force to the very part you're trying to keep seated.
Instead, run a fingertip lightly along the perimeter and check that every edge lies flat against the leather. If one section feels raised, press that section evenly before exposing the area to normal contact.
What to Do When a Leather Patch Lifts or Bubbles?
If a self-adhesive leather patch lifts at the edges, contamination or insufficient pressure is usually the cause; if a bubble appears during placement, gently work the trapped air towards an edge rather than repeatedly peeling the patch back up.
The symptom helps narrow the problem, but timing alone doesn't prove the cause. Inspect the surrounding leather as well: if its coating is separating, pressing harder won't create a sound base.
Patch symptoms, likely causes and fixes
| Symptom | Likely cause | Fix |
|---|---|---|
| Edges lift within the first day | Oil, conditioner or residue on the surface, or too little pressure | Press the lifted edge firmly from the centre out; if it won't hold, apply a fresh patch to a clean, dry surface |
| Edges lift weeks later | Residue or moisture trapped under the patch at application | Apply a fresh patch after cleaning and drying the area; don't reuse the lifted one |
| Bubble under the patch | Air trapped during placement | Work gently from the centre towards the nearest edge, then press the perimeter; don't repeatedly pull the patch back up |
| Corner catches and peels | Square corner | Press the corner down; round all corners on the replacement patch |
| Patch shifts when touched | Heat or friction before the bond settled | Remove the heat source, keep weight and friction off the spot, and press the edges again |
| Tear edge still shows through | Raised underlying damage or an unsupported gap | Don't expect the sheet to level the defect; reassess whether the damage needs a different repair |
Know when to replace rather than reposition
Repositioning a lifted edge is a last resort. Repeated handling can introduce dust and finger oils, so a fresh patch applied to a properly prepared surface is more reliable than trying to reuse a contaminated one.
Don't put cleaner underneath an attached edge or pour extra adhesive into the gap. Those actions introduce another product without resolving whether the leather underneath is clean, dry and stable.
If the actual problem is ongoing spills rather than a local cosmetic defect, stain-resistant sofa cover options address a different need. A repair patch shouldn't be treated as spill protection for the surrounding upholstery.
Is a Patch Enough for Your Leather Damage?
A self-adhesive leather patch is enough only for small, stable scuffs and short tears on otherwise sound leather, because the sheet covers damage without filling a hole or recolouring the surrounding surface.
Judge the condition of the leather, not just the size of the mark. A short split that opens whenever someone sits down can demand more than a larger, shallow scuff on a flat surface.
- Suitable damage: Local scuffs, scratches and short, stable tears with intact leather around them.
- Unsupported holes: A surface sheet doesn't replace missing leather or rebuild support underneath.
- Stretched or structural damage: Open seams, load-bearing areas and leather that pulls apart need a different repair.
- Widespread deterioration: Extensive peeling or cracking makes a patch the wrong tool for the job.
- Mould or valuable leather: Stop and seek specialist assessment rather than covering the problem.
The Western Australian Museum's guidance on repairing damaged leather treats tears, splits, infilling and consolidation as specialised work. That distinction matters: cosmetic coverage isn't structural restoration.
For widespread cosmetic damage on otherwise usable seating, consider Couch Covers, while recognising that a cover won't fix broken upholstery either. For appearance rather than repair decisions, leather couch styling with Casamé Home is a separate resource.
Decide whether the damage is suitable before buying, rather than expecting a surface patch to solve an underlying failure.
A patch can cover small, stable damage, but it doesn't repair the leather underneath.
Casamé Home offers a self-adhesive leather repair patch for covering suitable local damage without mixing filler or colourant. Visit Casamé Home to check the patch details, then prepare a clean, dry, flat surface before cutting and applying your repair.